Adding assets and scripting your visual novel game
Welcome to the third (and final) part of the series on "Let's Build A Simple Visual Novel Game Using Ren'Py"! We’ll be discussing how to add the assets in your game along with some basic scripting to make our game come alive. Let’s do this!
By now, you should have your GUI customized and have a sense of how the game directory is set up when editing your files. If you haven't done so, please be sure to check out part 2 of my series. Once you're ready, feel free to proceed!
Adding the assets into the game
For this project, we’ll be adding our assets to our game directory. Placing the images and the audio is important as Ren’Py will need to know where your assets are located.
With the background and character sprite images, they should be added within the images folder. For the audio file, they're added within the audio folder. Below is what it looks like on my end:

The importance of having a storyline
Creating a visual novel game is a rewarding experience. But, if you don’t have a clear idea as to what the story will play out, then it would be hard to set the stage when you start scripting out the dialogue. For this game, I've gone ahead in writing out my short storyline. Here's what it looks like:
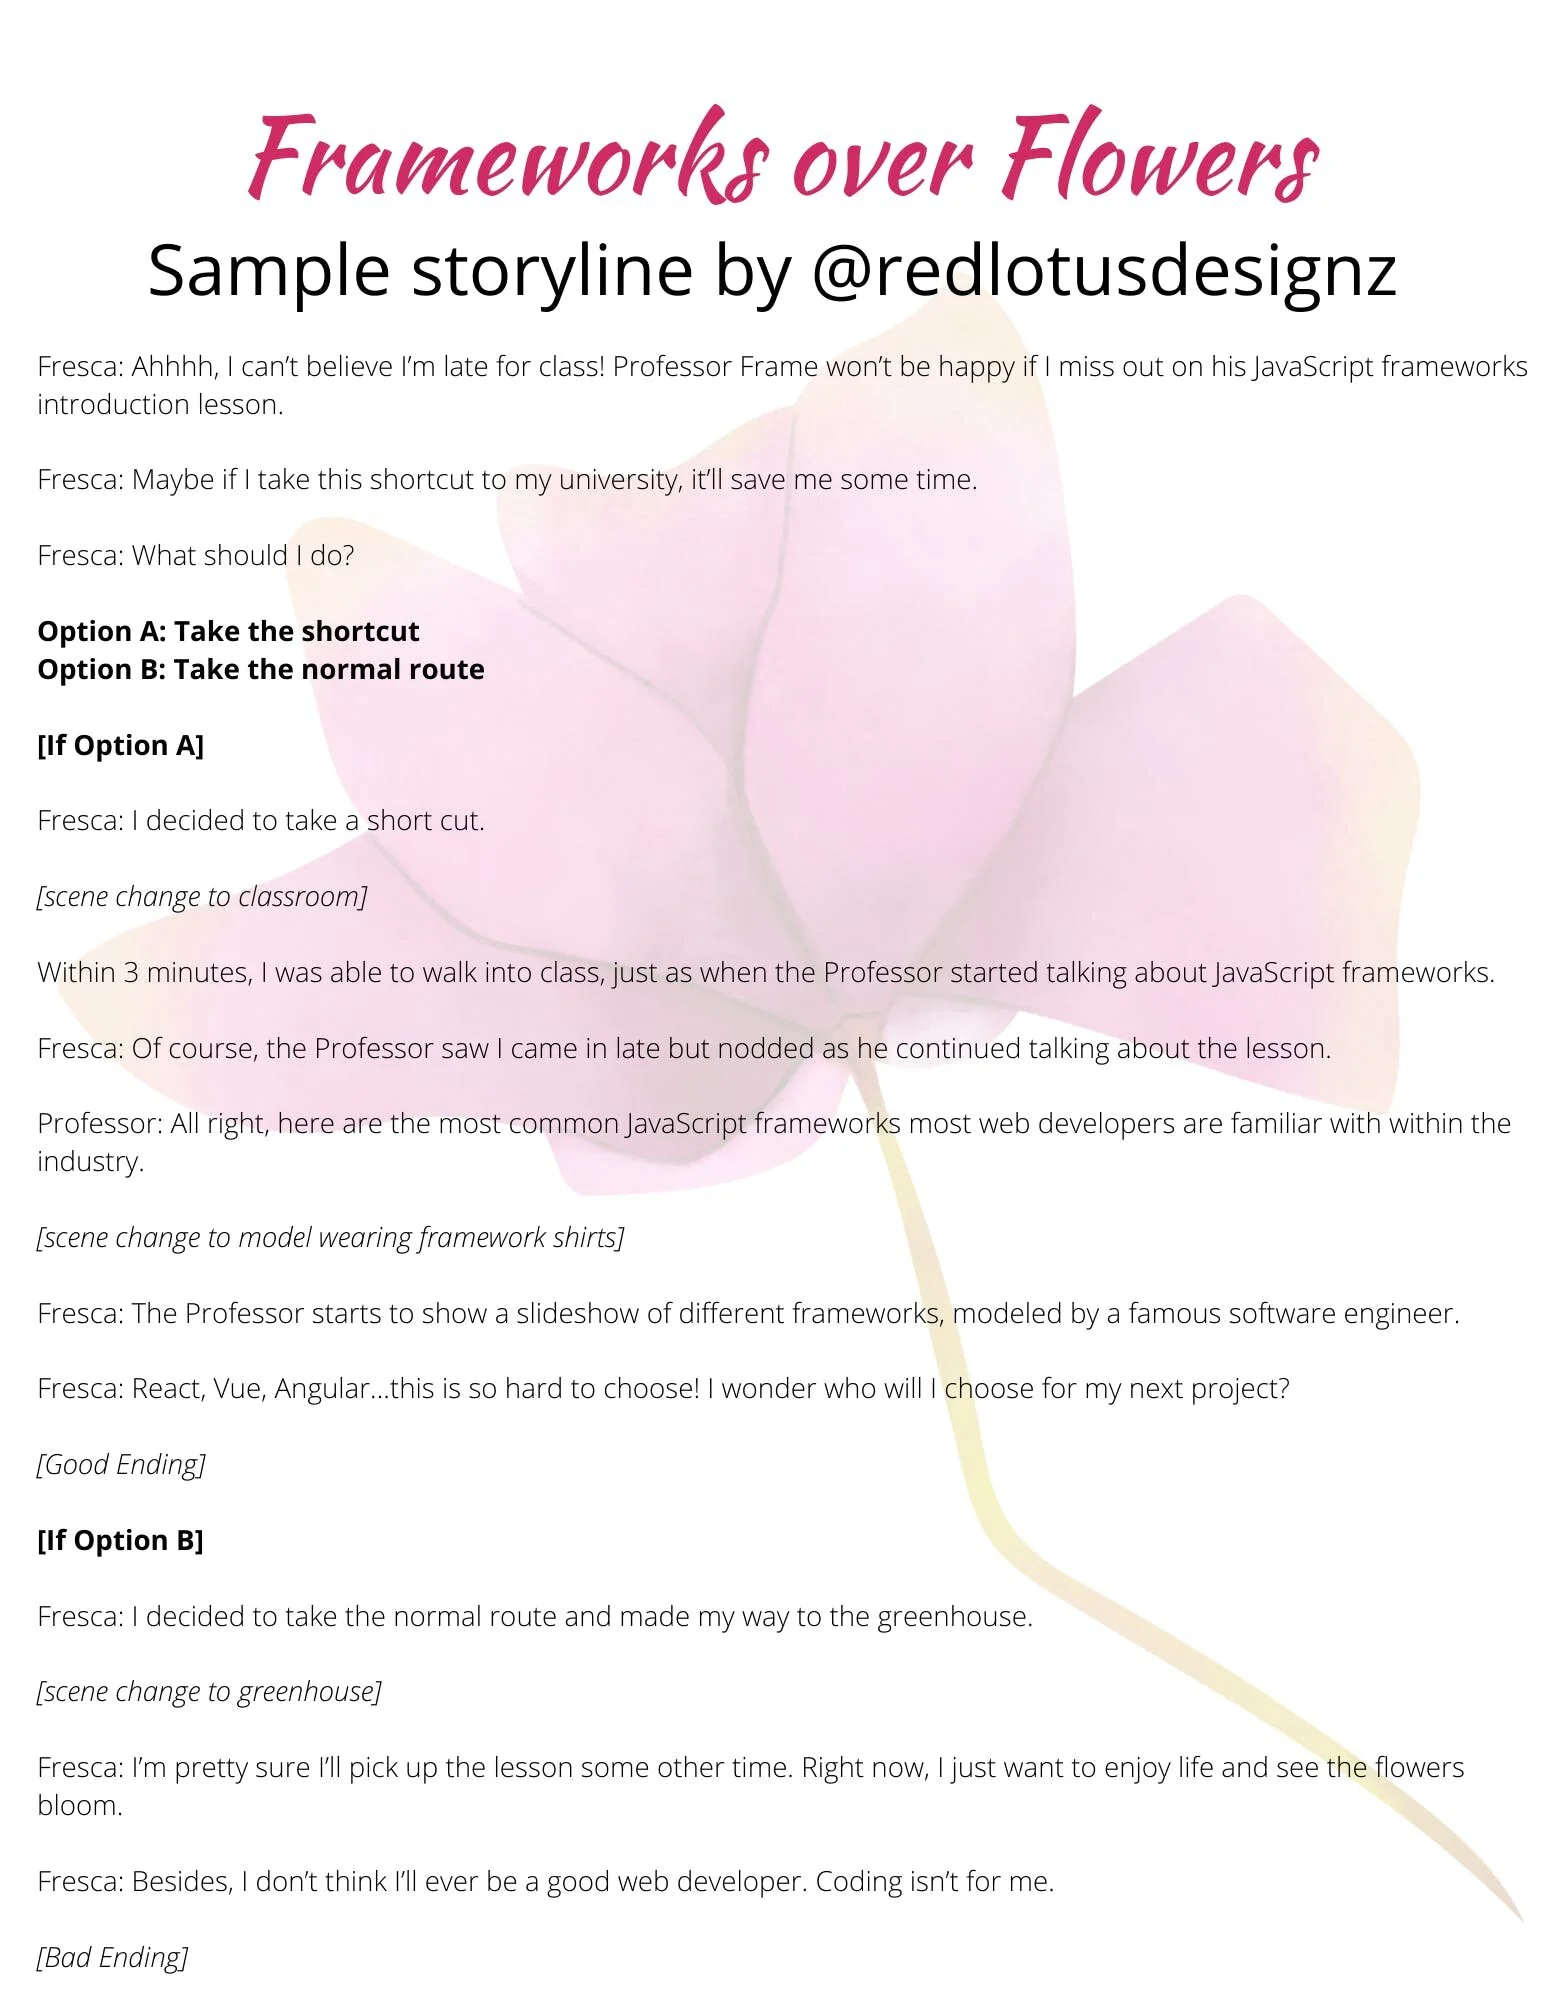
We see Fresca (the main character) running late to her coding class. She needs to make a choice if whether or not she'll take a shortcut. When I write my storyline, I place brackets indicating where the scene changes and bold the choices that the user can make during the game. Not only it helps me see the logic flow, but it makes writing out the script easier when I start to label the choices within the script file.
While my storyline may be short, you're more than welcome to expand on your project with a lengthier dialogue and choices for your visual novel game. This is just a template that you can follow along as you build out your project.
Scripting the dialogue
Now that we can see what our dialogue will look like in the game, it’s time to convert them for our script. It helps to have the dialogue written first so this way it'll make adding the assets much easier later on. You'll want to open up your script.rpy file using the code editor of your choice (I'm using Atom).
At the very top of the file, you will define the characters as the variables that will need to be used when writing out the dialogue:

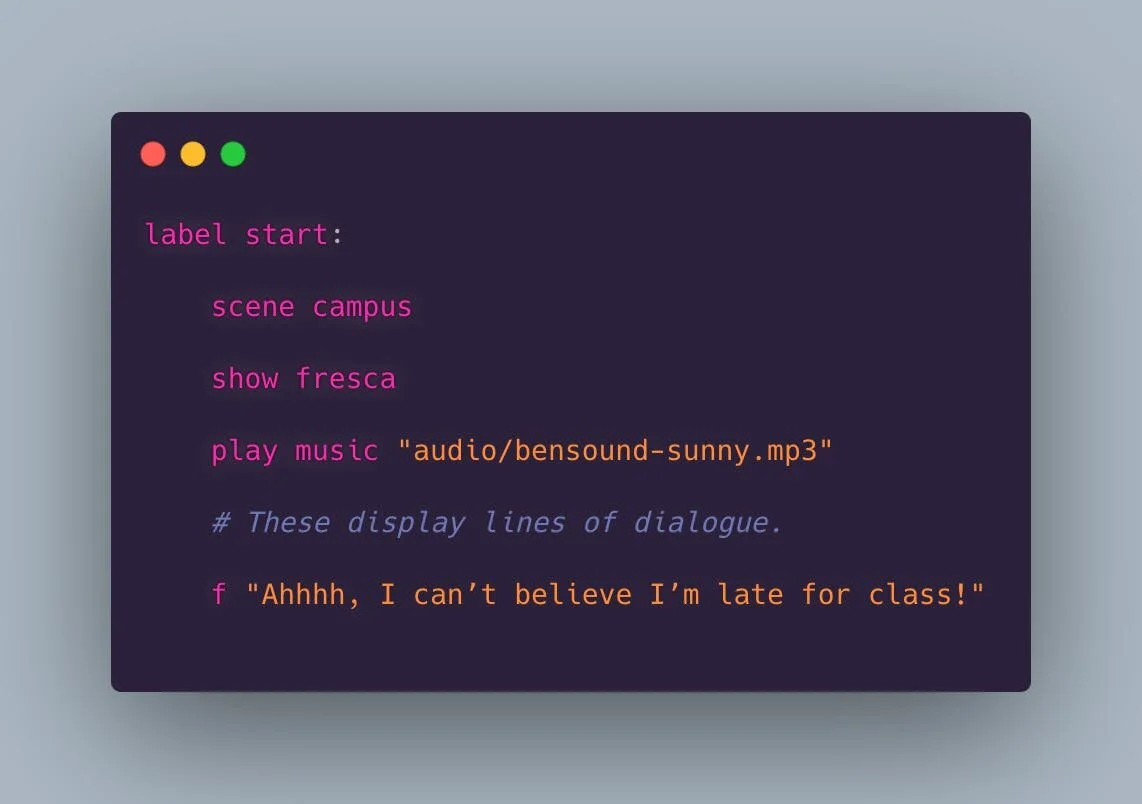
Locate the area where it says label start. This is where the game will begin once the user clicks "Start" on the main menu. We will start converting the dialogue from the storyline into readable strings. To write individual lines of a character's dialogue, it will be the variable name and the script text in quotation marks. As an example:

Once we get to the part where we need to set up our choices, we will be utilizing the menu store variable where we indicate the breakpoints for the choices. What this is doing is telling our visual novel game to pause and wait for the user to make a choice. Depending on the choice we make, it will jump to the label as specified from the menu store variable. As an example:

Similar to Python, indentation is very important when structuring your code, especially when you're creating menus and jump indicators. Any slight mishap with your code and it'll result in spewing an error when attempting to launch your project. Here's an example of an error when I accidentally indented the options within my script file and launched the project:

Once we have written out the dialogue, we want to add in the label goodchoice and label badchoice areas return statements at the end so this way we tell the game it will stop running if those conditions are met. Had if we add one return statement at the end of the file, the user would end up seeing both choices being played out if they choose the first option.
Here's what it'll look like with the dialogue and menu set up before adding in the assets:

Adding the character, scene changes, and music
Now that we have the dialogue script on our file, it's time to add the assets! As noted in the storyline document above, there are areas where you want to do a scene change. Additionally, we want to introduce our character sprite as she enters the scene, along with our background music that will be played throughout the game.
Right above our initial dialogue, we'll go ahead and add the following lines of code:
A breakdown of what's happening with the lines of code:
The
scenestatement allows us to add our background image. In this case,scene campusindicates we're adding thecampus.jpegfile that's residing within theimagesfolder.The
showstatement allows us to add our character sprite in this scene. In this case,show frescaindicates we're adding thefresca.pngfile that's also within theimagesfolder.The
play musicstatement allows us to add music to our game. For this one,play music "audio/bensound-sunny.mp3"shows it's being pulled from theaudiofolder.
Here's what it'll look like when you add the assets for the initial scene:

Here's what the menu would look like when the user is prompted to make a choice:

So far, so good! Our visual novel game is starting to look better.
On some of the scene changes, such as when Fresca goes to her classroom, it helps to have a nice transition from her previous environment. We can simply add the statement with dissolve underneath the scene classroom statement which will do a transition effect when moving from the campus to the classroom. Here's what it looks like:

Keep in mind that when doing scene changes, you'll also need to add in your character sprite on the new scene. It will not carry over from the last statement that was declared previously in your script.
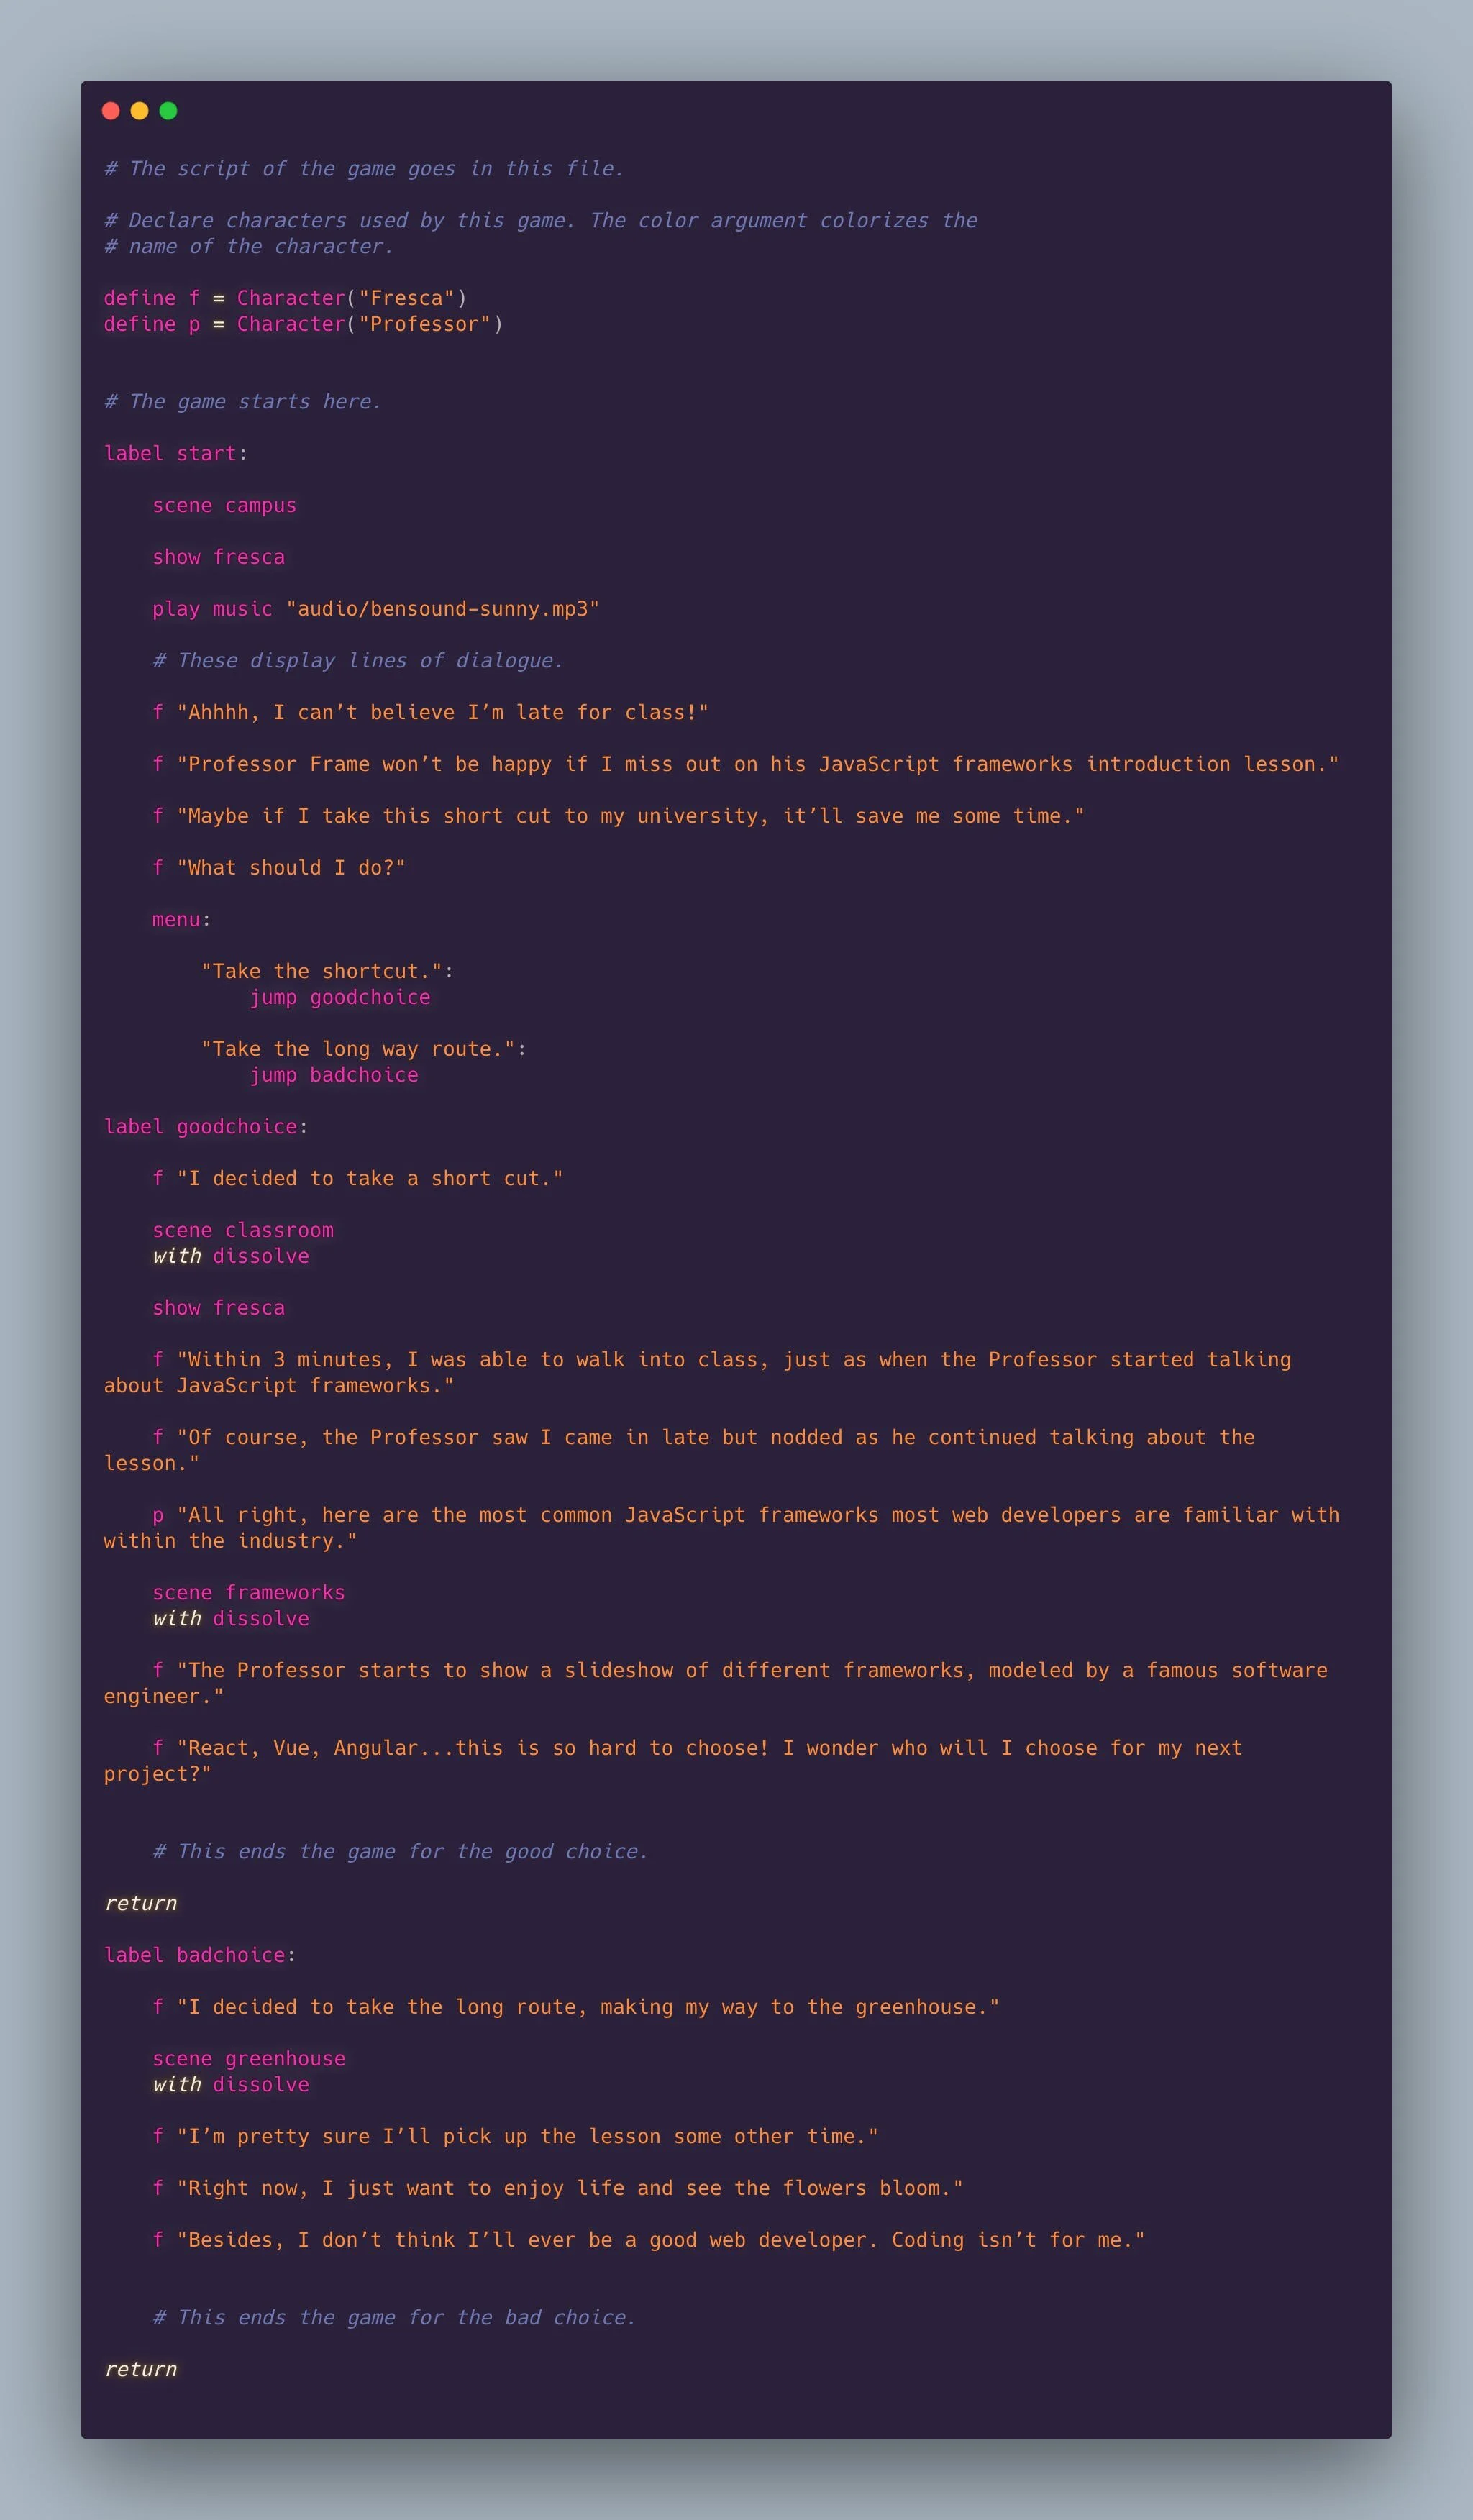
Phew - that was a lot! By now, you should have a script file that contains the dialogue, menu choices, and assets included in your visual game. If you want to see the full script, below is my snapshot of how my script.rpy file looks like on my end:
Test out your game
Now comes the fun part - testing out your game! If everything works out well, you should be able to launch your game without any errors.
Here's how the game works from start to finish while testing out the choices.
Building your game
Depending on your preference, you can have your game available on the Windows, macOS, and Linux platforms. You can also have them published on the iOS and Android platforms. Keep in mind that you'll need to have iOS and/or Google Play Developer accounts in order to have them published in their respective app stores.
For the purpose of this tutorial, we'll go ahead and build the distributions for the Windows and macOS desktop platforms. Open up your Ren'Py Launcher and locate the area where it says Build Distributions.

You'll be taken to the next window where it'll provide options on how you want your game to be distributed. I kept it as the default, shown below:

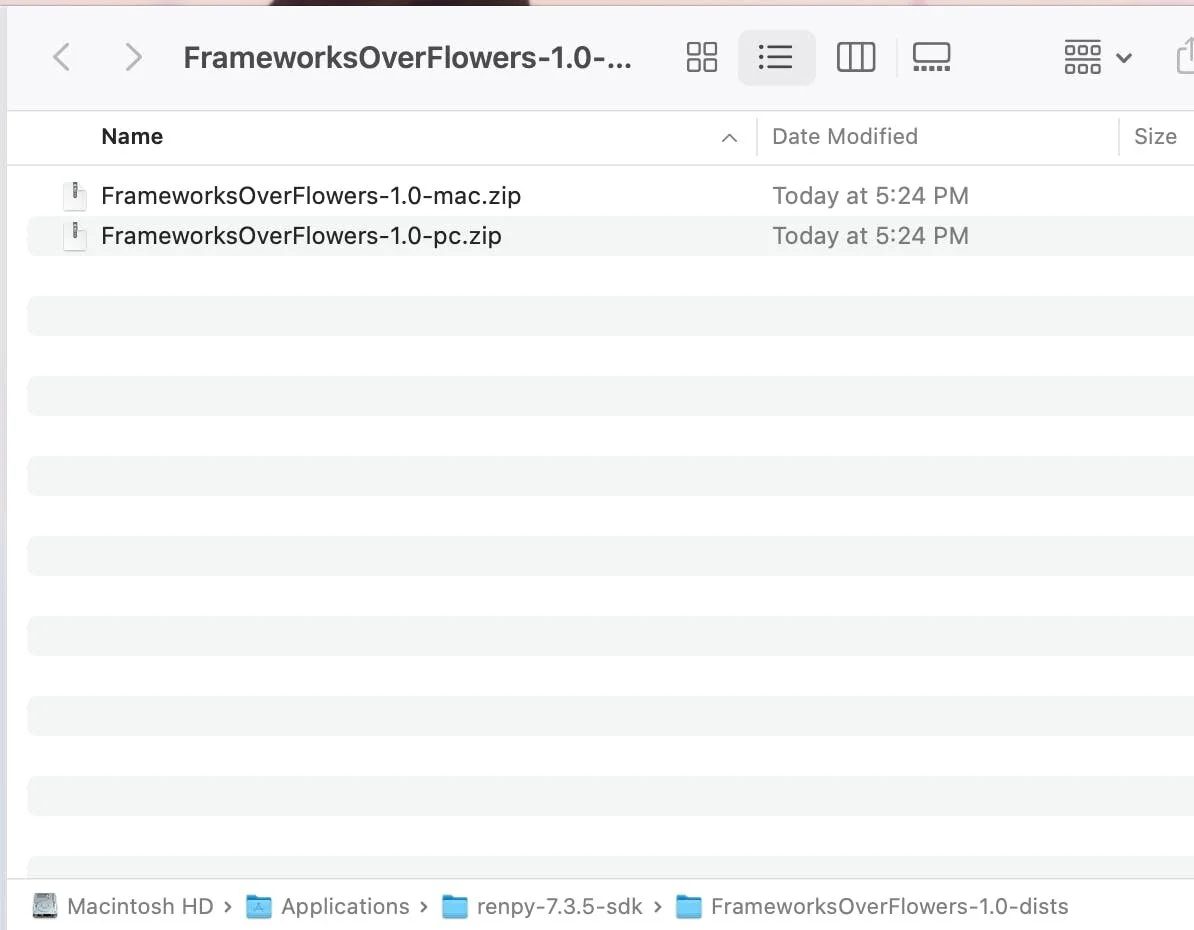
Go ahead and click Build. Depending on the length of your project, it might take less than 5 minutes for Ren'Py to build out your visual novel game. Once it's completed, you'll be able to view the final product within your Ren'Py folder, as shown below:
What's next?
I hope this tutorial helps you feel confident now that you have the basics in creating your first visual novel game! I highly encourage you to check out Ren'Py's documentation page for more information and to learn more advanced customizations for your visual novel game.
You can check out my available visual novel games over at my itch.io profile.
Happy creating!